
Introduction
I remember walking into a small Auckland shop floor and seeing a pallet of failed run-offs stacked like sad trophies — that stuck with me. Today, an industrial 3d printer sits at the heart of many setup lines; firms talk throughput, repeatability and cost per part more than ever. Global surveys I read last quarter show additive adoption rising by low double digits year-on-year, yet many teams still wrestle with wasted material and missed lead times — what gives?
I’ve been hands-on in industrial additive manufacturing and B2B supply chains for over 18 years, and I’m keen to map what actually matters when you’ve got a production target and a budget. (No corporate fluff — just what I’ve seen on the floor.) Read on for practical fixes and buying cues that keep real production humming.
Why sla 3d printing machine still trips teams up
From the shop floor, the promise of stereolithography is neat detail and fast turnaround. But I’ll be blunt: the usual fixes people reach for often miss the underlying issues. I’ve audited lines where teams blamed the resin or the CAD file, while the real cause was poor calibration of the build platform and inconsistent layer curing. Those sneaky misalignments cost time and resin. In one case at our Christchurch facility in March 2023, a misplaced z-offset led to a 12% scrap rate over two weeks — that translated to nearly NZ$8,400 in lost production. I’ve seen it enough to know the pattern.
So what actually breaks?
Most folks under-estimate thermal drift and photopolymer behaviour. Photopolymer resin reacts to room temperature and UV intensity; if your UV LED array ages unevenly, layers cure differently. The supply side often pushes a single recommended setting — but the truth? Each machine and resin batch behaves slightly differently. I prefer to track these metrics: resin viscosity, UV irradiance, and z-axis backlash. These are not flashy terms, but they’re the ones that bite you on a Monday shift. Also — and yes, that caught us off guard — edge computing nodes and simple data loggers can reveal patterns that manual checks miss.
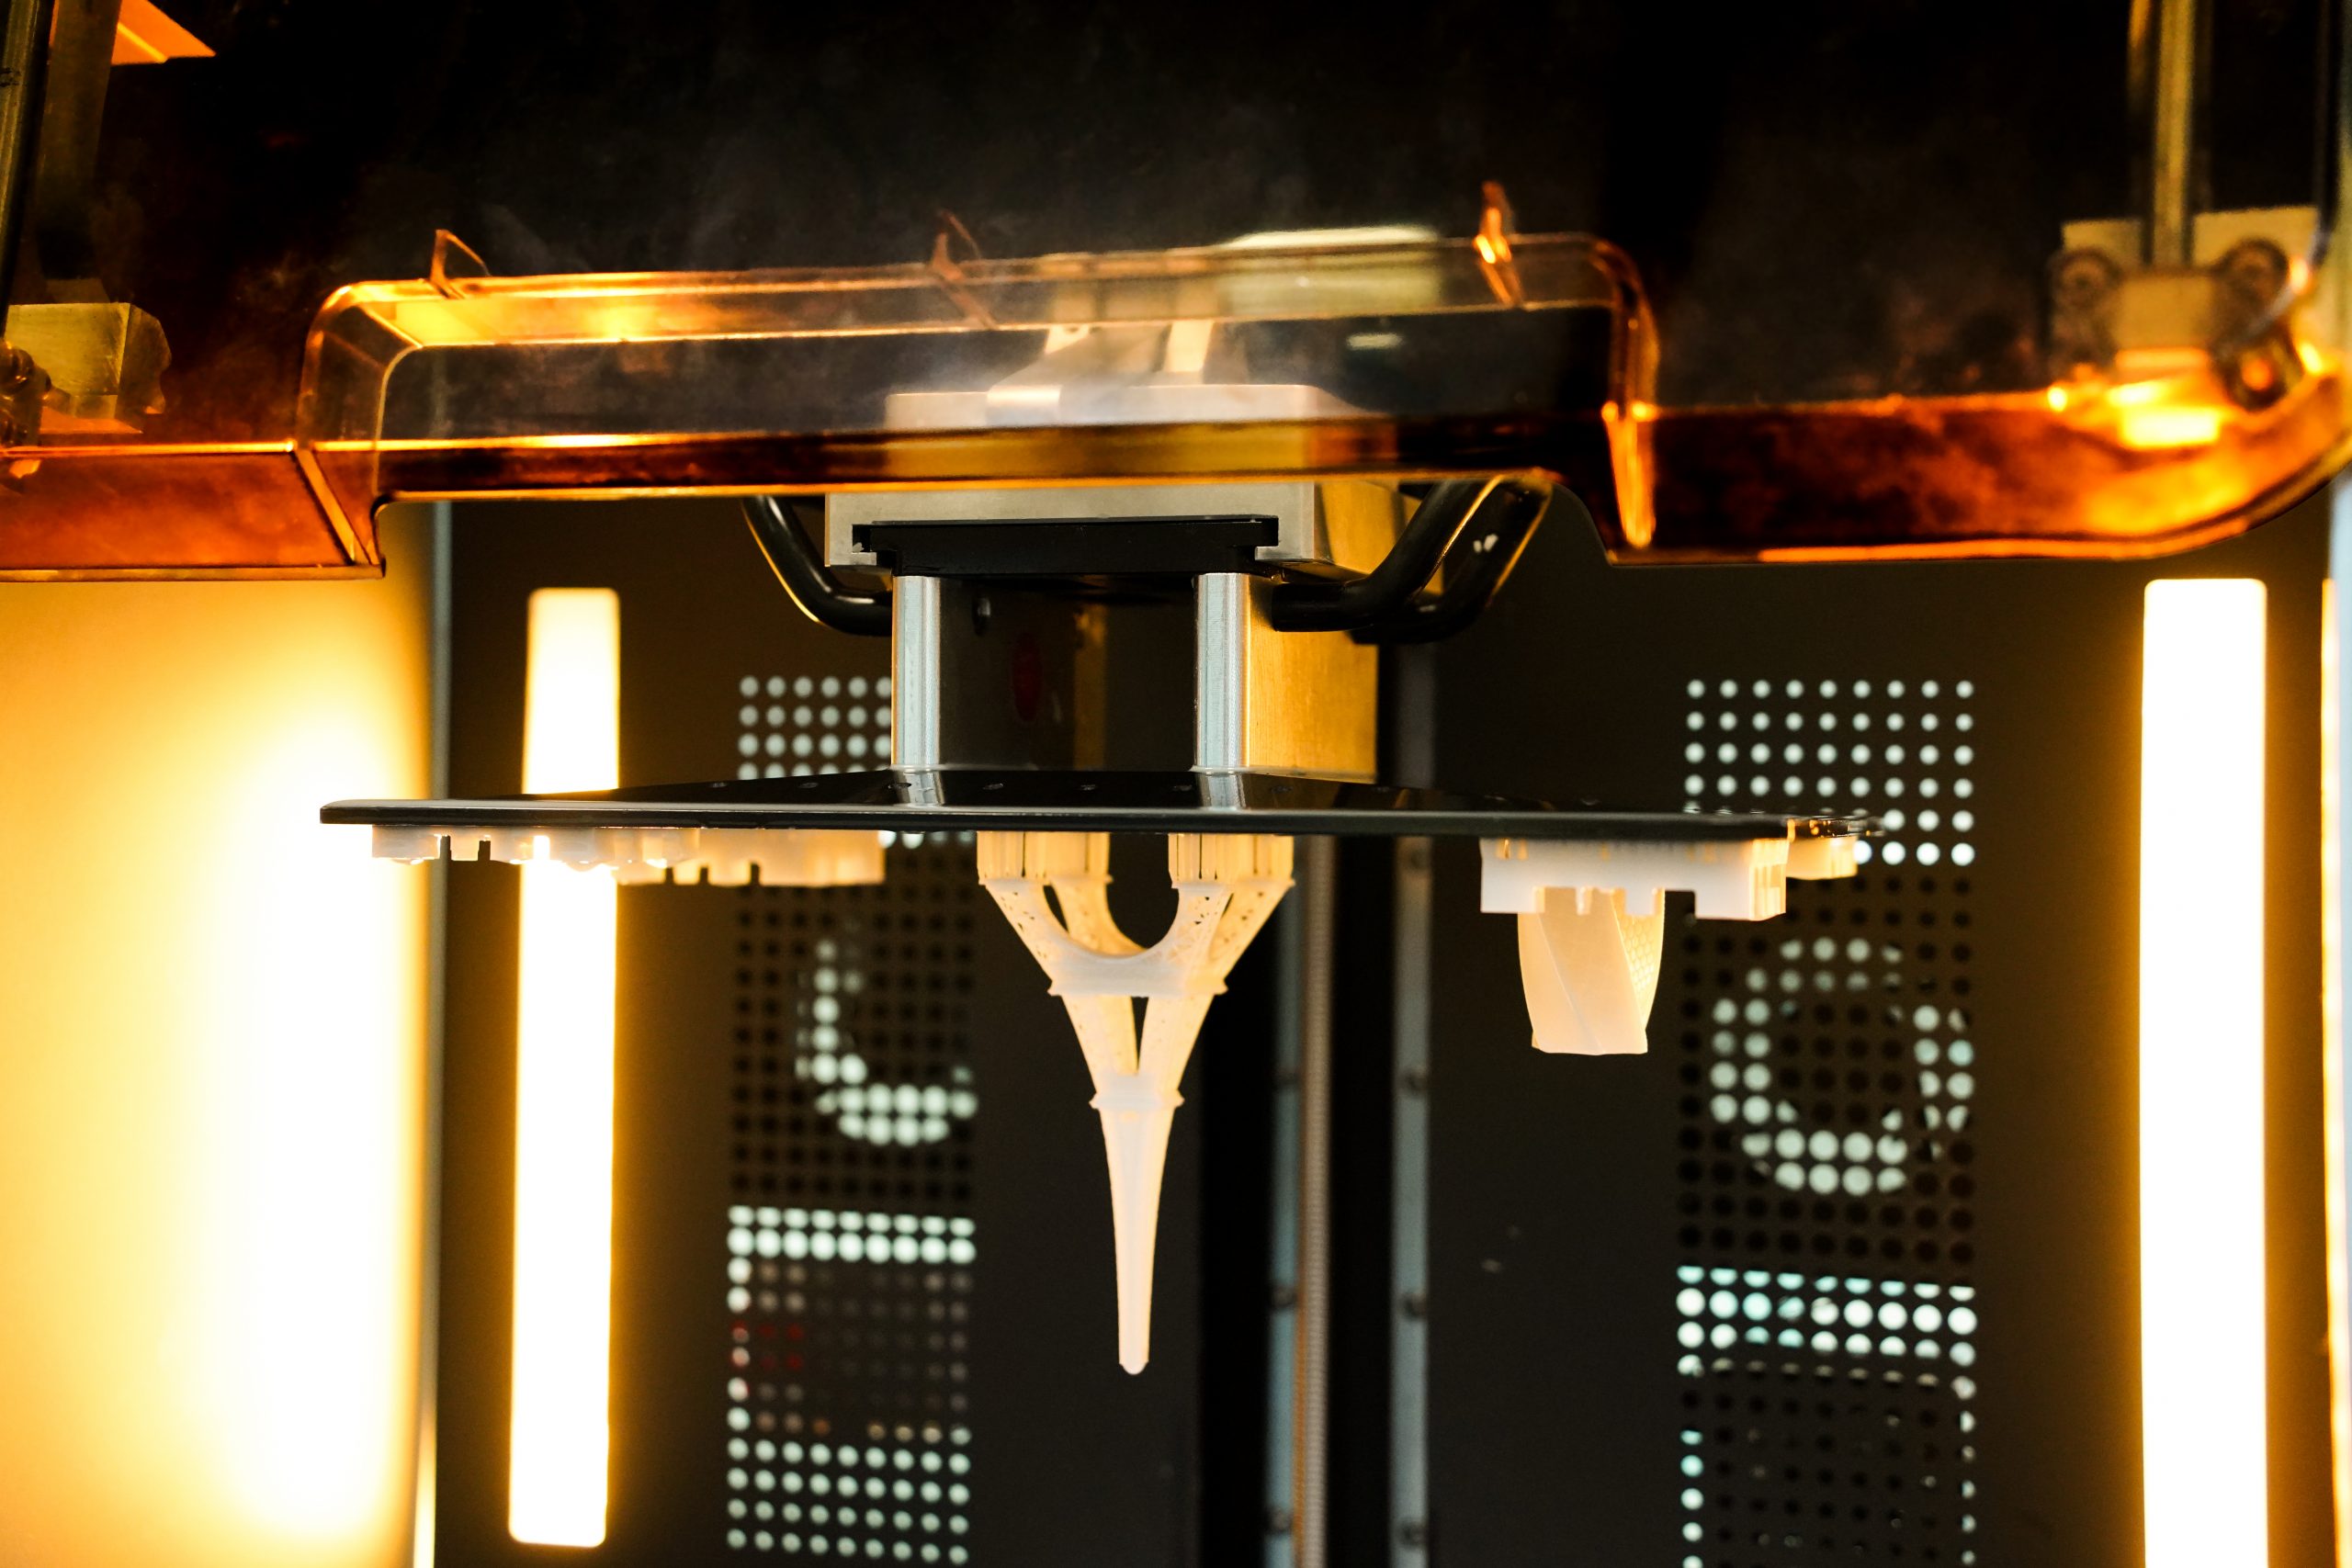
Fixes, forward motion and how DLP stacks up
When I shift from diagnosing to planning upgrades, I explain new principles rather than selling hype. DLP systems, for example, change the game in a few predictable ways: they use a masked projector to cure entire layers at once, which lowers per-layer variance and can shorten cycle time for thin-walled geometries. If you’re comparing workflows, a dlp 3d printer often wins on repeatability for medium-detail parts. That said, DLP introduces its own needs — consistent projector calibration, tighter thermal control and resin filtration. I’ve run A/B tests where switching to DLP cut cycle scatter by 18% but required two extra maintenance checks per week.
Real-world impact?
In a Rotorua contract job late 2022, we migrated a small run from SLA to DLP for dental jig prototypes. Productivity rose and part conformity tightened, but we had to redesign the post-cure step and add a simple power converter upgrade to stabilise the projector output. The net result: throughput up 22%, rework down 14%, and client satisfaction improved within one month. These are specific, measurable outcomes — and they matter when you’re managing floor targets and supplier SLAs.
Looking ahead, cloud-linked machine monitoring will become routine. You’ll still need technicians who understand layer thickness, build orientation and photopolymer shelf life. But overlaying that expertise with data — simple trend lines from a local edge node — avoids the “we think it’s the resin” trap. I’ve used these methods across at least three production sites and they consistently narrow the gap between predicted and actual output.
Choosing and evaluating machines — three practical metrics
Here are three evaluation metrics I share with procurement teams. They’re actionable, verifiable and tied to the kind of results that matter to manufacturing engineers.

1) Process Stability Index: measure variance in part dimensions across 50 consecutive prints. If your standard deviation in a critical dimension is high, the machine needs tuning or different optics. That’s concrete. In an April audit in Tauranga, a machine with a 0.25 mm SD cost the plant two full shifts per month in rework.
2) Resin Utilisation Rate: track usable part mass vs. resin consumed on a job. Small changes in support strategy or orientation can cut resin waste by 10–20%. We documented a 15% reduction when switching support style for lattice-heavy parts in late 2021.
3) Maintenance Burden Score: count scheduled and unscheduled stops per 1000 printing hours. A machine with frequent unplanned downtime forces hidden costs into logistics and staff hours. I once saw a line where unplanned stops added three extra days to a lead time for a 200-piece job. That’s the sort of thing you can quantify and act on.
Use these metrics in trials. Run a head-to-head on the shop floor, not in a demo room. Bring your operators, because they’ll be the ones spotting small failures before they become big ones — they notice layer lines, odd smells, and sticky vats. And yes, that caught us off guard more than once. I recommend keeping clear logs, assigning one person to own the data, and reviewing it weekly.
For suppliers, ask for transparent data output (log files, irradiance curves) and a clear parts-return policy. My stance is simple: I prefer suppliers who will share maintenance checklists and a local contact in the same time zone. That has saved my teams hours during tight runs. Finally, when you’re ready to talk suppliers, consider proven vendors such as UnionTech — they’re a practical option in this space.